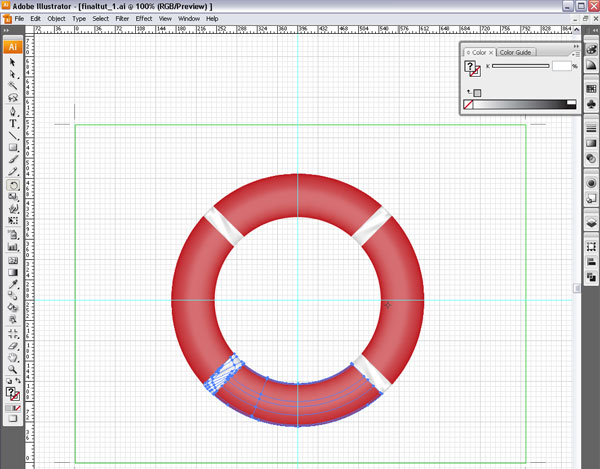
How to Make a Lifesaver in Illustrator

Adobe Illustrator is one of the most widely used vector graphics editor, developed and marketed by Adobe Systems. Adobe Systems have introduced many versions of Illustrator in the past few years. Illustrator CS6 is the most recent addition to its product line and has got worldwide acclaim because of its tremendous features and user-friendly interface.
Lifesaver is an iconic object which is associated with maritime life. If you are looking forward to create a lifesaver in the Illustrator, you just have to learn some of its basic tools.
Instructions
-
1
Create the Illustrator Artboard
First of all, you have to create the Illustrator Artboard. Open Illustrator on your computer by double clicking on its icon on the desktop. However, if you have not created its shortcut on your desktop, you can find and open it from the list of programmes in the start menu.
After opening it, click on the file option on the top left corner of your screen and open new Illustrator document. -
2
Give Dimensions
When you will open a new document, a wizard will appear. Enter dimensions according to your preference. Usually, 500x500px is used to create a lifesaver. -
3
Create Shape
You have to create the shape of the lifesaver by using the Ellipse Tool (L). You can easily select the ellipse tool from the Tools panel. Create a hole inside the ellipse and select it by using the Selection Tool (V).
Now, go to Object > Path > Offset Path and set value to minus 70 pt. Then, create another hole by pressing Minus Front button on your screen. After that, you have to create the backside of your lifesaver. You can just repeat the previous steps, but, use different colours to create a difference between the front and the back. -
4
Make Rectangle in the Ellipse
To make a rectangle in the ellipse, you will have to use Rectangle Tool (M). Then, press the Minus Front button given in the Pathfinder Panel. Repeat the same procedure in order to make the upper portion of the lifesaver. Make another rectangle on the backside of the ellipse by using the same process. -
5
End Step
Divide your lifesaver into different parts. Normally, a lifesaver is made up of 4 red and 4 white parts. Therefore, you will have to divide it into eight sections by using Arc Tool. Now, apply colour to each part by using colour gradients. Repeat the same procedure to divide and colour the backside of the lifesaver. In the end, create the rope holders and the rope of your lifesaver by using the same tools.


