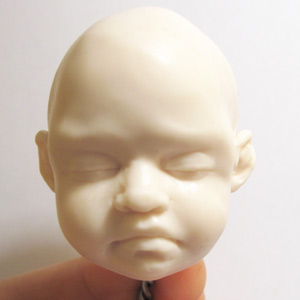
How to Make Polymer Clay Doll Parts

Ready-made doll parts, made of clay or plastic, can be bought for numerous different manufacturers, however it is also possible to make your own parts and thus customise them as desired. Making clay doll parts at home is easy and the way each part looks would mainly be dependent on your creative skills.
Things Required:
– Polymer clay
– Clay colouring
– Plastic wrap
– Clay tools
– Aluminium foil
– Oven
– Metal or glass tray
– Paints and brushes (optional)
Instructions
-
1
Use your hands to knead the polymer clay until it pliable. If you want to use different shades of clay, this is the ideal time to divide the clay and add desired colouring to each section.
-
2
Create the doll’s head by making an egg form out of clay. In order to make the neck, push and pull down clay from the back of the head until it extends behind the chin. Form the doll’s forehead, cheeks and jaw line in a similar manner.
-
3
For the doll’s nose, use a piece of clay and roll it into a cone shape. Press the cone shaped piece of clay into the centre of the face. For a more natural look, smooth down the side of the nose over the cheek area. Roll out a small quantity of clay into a coil and use it to make the doll’s lips and ears.
-
4
Inscribe a circular channel at the neck’s base using an appropriate clay tool. This is the point where you will draw up fabric and attach the head to the fabric body. The channel you just inscribed would prevent the fabric from slipping off.
-
5
Roll out clay into two coils. The length of each clay coil should be 4.5 times the length of the head. These clay coils will serve as the doll’s legs. You may vary the length of each coil if required. Place a small kink in each of the coils to simulate the knees and then add the feet as well. Vary the thickness to simulate thighs and calves if required.
-
6
Make the doll’s arm out of clay rolled out into coils. Length of the arms should be 3.5 times the length of the head. Add the desired details to the hands as well.
-
7
Place the doll’s arms, hands, fingers and legs in cradles of crumpled aluminium foil to complete the finished doll’s pose.
-
8
Follow instructions on the back of the clay packaging to bake the parts in an oven. Place the doll parts on a metal or glass tray before putting them into the oven.
-
9
When the clay cools down completely, use paint to add features such as the doll’s eyes, lips and desired skin tone. Finally attach the parts to the body of the doll.


