How to Install WordPress

WordPress is not just a blogging software, instead it can be used for any kind of content management. Whether you need a corporate blog, a news site, image gallery, small business catalogue or a personal blog; WordPress stands as top choice. It’s not just easy to use, but has too many useful features, i.e. it is free, SEO friendly, has thousands of free templates available, can be customized to a greater extent with plugins and besides that the WordPress security is much better than other blogging platforms. WordPress Installation is an easy process; however, for beginners it may not be that clear. So, let’s have a quick look at the procedure for installing WordPress in less than 5 minutes.
Instructions
-
1
Things to Consider Before Installing Wordpress:
Check with your web hosting provider if they support Wordpress or not. Worpress needs PHP 5.2.4 or greater and MySQL 5.0.15 or greater in order to work perfect. Verify before starting installation.
Have an FTP Client, i.e. FileZilla or CuteFTP Pro installed on your system, which will be used to upload wp-content/uploads on your server.
Decide where to install Wordpress, i.e. yourwebsite.com or yourwebsite.com/blog
Linux is recommended for beginners, but in case if you've Window's hosting that can work fine too.

-
2
Downloading Wordpress:
Download the latest version of Wordpress from Wordpress Official website. It will be downloaded as a Zip folder.

-
3
Setting Up Database:
The database creation option is available in your respective hosting panel. Press ctrl + F and locate Database. Create a new database and then create a user. Now add the user in database with all privileges.

-
4
Uploading Files to the Server:
A- Through cPanel: If your hosting provider offers cPanel, login to your cPanel which should be located at yourwebsite.com/cpanel. Now press Ctrl + F and locate ‘File Manager’ and click on it. The File Manager will open your root directory by default. Locate ‘Upload’ and upload Wordpress Zip folder. If you want to set up blog on yourwebsite.com/blog, within File Manager, create a folder named as ‘blog’, click on it and then upload Wordpress.
B- Through FTP: Open your FTP software, enter server details, locate the desired folder, i.e. public_html or ‘blog’ and upload the Zip folder.
Once the folder is uploaded, unzip/extract it. By default it will extract wp-content/uploads within a folder ‘wordpress’, so move all the wp-content/uploads on the place where you need them, i.e. in root or ‘blog’.
-
5
Setting Up Configuration File:
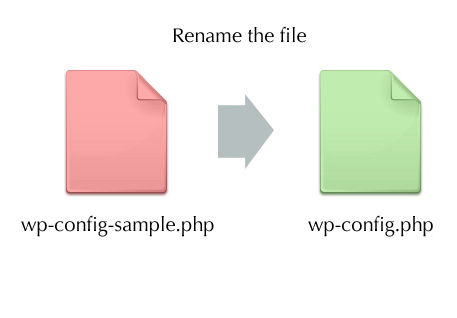
Now, locate configuration file, i.e. wp-config-sample.php in the wp-content/uploads that you’ve just uploaded in the root or ‘blog’ folder. Rename this file as wp-config.php, open it, add database and user details and save it.

-
6
Run the Installation:
Now run the installation by opening installation page. If you’re installing Wordpress in root, it should be yourwebsite.com/wp-admin/install.php and in case of /blog it will be yourwebsite.com/blog/wp-admin/install.php
Add the required username, password and your email address and hit install.


