How to Delete Your Application History in Windows 8

No doubt, Windows 8’s features are amazing enough to grab any one’s attention. The developers have succeeded in providing a complete package of convenience and ease. Metro application is one of the most admirable app of Windows 8; and the best thing about this is that if you are using any Metro app it will not close, it will get paused and you can easily open it again instead of accessing the application from scratch.
But if you want to delete the history of metro application in order to maintain your privacy along with take an exit from a running application then that can also be done.
A simple procedure stated below will help you in deleting your application history in Windows 8.
Instructions
-
1
Start up your computer in case it is not already running. Wait for your computer to start and get the desktop ready. When it is ready, then you can proceed. The process starts by opening the side bar; click Windows + I altogether and a side bar will appear on the screen.
-
2
On the bottom of the side bar a link saying More PC Settings, can be viewed, click the link.
-
3
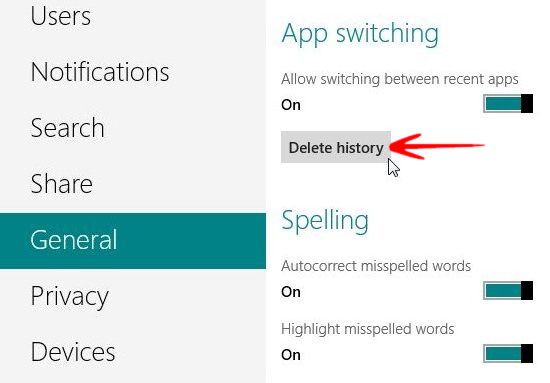
Within few seconds New Metro Control Panel will load. From the viewed options you will have to select General.
-
4
A small dialog box will appear on your screen with the heading App Switching. On the bottom left side of the window Delete History can be viewed, click it.
-
5
If any other metro application is running while performing this function it will close down automatically. Besides closing the application it will also remove their appearance in the history.
-
6
That’s it, the process is trouble free and you will be able to remove the history in no time.


