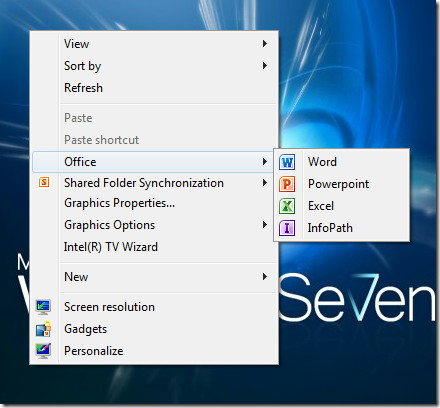
Add Multiple Types of Items to the Desktop Context Menu in Windows 7 or 8

Windows 8 is an exclusive operating system that allows you to add as many programs as you wish so that you can conveniently start the programs and access a folder or particular website.
A new tool by the name of Right Click Context Menu Adder is used in Windows 8 for the purpose of adding programs, websites, or folders. This tool is very reliable and helps you add any kind of program.
In your Downloads folder, extract the zip file or Right click the Context Menu Adder.
If you wish to see how this tool operates and make your work easy by adding various programs, site address, and folders then go through the guide of add multiple types of items to the desktop context menu in Windows 7 or 8
Instructions
-
1
A dialog box will appear on your screen titled User Account Control. Click the Yes button in order to continue the process.
-
2
Another window will open. Select the Add items to Menu tab and click on the Program radio button.
-
3
Next you will have to add the program. This can be done by clicking the Search button.
-
4
A window will appear on the screen. It will expect you to select a program. Select the exe file from the program and then click Open.
-
5
Your program file will automatically be extracted.
-
6
On the similar window you can make changes with icon. Change the position of the menu, or according to your choice add only to the Desktop Context Menu or the Folders Context Menu as well.
-
7
After making relevant changes click the Add to Context Menu button.
-
8
To confirm the changes made, click OK.
-
9
You can add a web address in a similar manner by selecting its radio button and if you check the Download Website icon check box, then it will automatically download it.
-
10
Next you will have to enter the website under Program to add and then specify the other options as mentioned earlier.
-
11
To add a folder, click the Choose Folder button and select the desired program from the list viewed, and then follow similar procedure stated above.


