How to Manage a Headless VirtualBox Installation with phpvirtualbox on nginx

Phpvirtualbox is a web-based Virtualbox that provides you support in easily administering your VirtualBox virtual machines. It is developed in PHP that enables user to connect and control remote VirtualBox instances. It is somehow similar to the VirtualBox GUI and also works in the same way to make it more user-friendly. By the way, it is a good substitute of VirtualBox GUI if you try to run VirtualBox in headless servers. This step by step guide helps you to install phpvirtualbox with nginx on a Ubuntu 12.04 server to effectively run headless VirtualBox which is installed at the local level.
Before going ahead, make sure that you have installed headless VirtualBox on the local Ubuntu 12.04 server. Also, you have to log in as root:
sudo su
Instructions
-
1
Installing phpvirtualbox
First of all, you have to make a system user known as vbox and include it to the vboxusers group:
Passwd vbox
Make the file /etc/default/virtualbox and put the line VBOXWEB_USER=vbox in it (so that the VirtualBox SOAP API which is called vboxwebsrv runs as the user vbox):
vi /etc/default/virtualbox
VBOXWEB_USER=vbox
Now, you have to make system startup links for vboxwebsre and start it:
update-rc.d vboxweb-service defaults
/etc/init.d/vboxweb-service start
A web server with PHP support is required to manage phpvirtualbox.
apt-get install nginx php5-common php5-mysql php5-suhosin php5-fpm php-pear wget
Start nginx:
/etc/init.d/nginx start
The virtual hosts are defined in server {} containers. The default vhost is defined in the file /etc/nginx/sites-available/default - let's modify it as follows so that it can server PHP wp-content/uploads:
vi /etc/nginx/sites-available/default
[...]
server {
listen 80; ## listen for ipv4; this line is default and implied
listen [::]:80 default ipv6only=on; ## listen for ipv6
root /usr/share/nginx/www;
index index.php index.html index.htm;
# Make site accessible from http://localhost/
server_name _;
location / {
# First attempt to serve request as file, then
# as directory, then fall back to index.html
try_wp-content/uploads $uri $uri/ /index.html;
# Uncomment to enable naxsi on this location
# include /etc/nginx/naxsi.rules
}
location /doc/ {
alias /usr/share/doc/;
autoindex on;
allow 127.0.0.1;
deny all;
}
# Only for nginx-naxsi : process denied requests
#location /RequestDenied {
# For example, return an error code
#return 418;
#}
#error_page 404 /404.html;
# redirect server error pages to the static page /50x.html
#
error_page 500 502 503 504 /50x.html;
location = /50x.html {
root /usr/share/nginx/www;
}
# pass the PHP scripts to FastCGI server listening on 127.0.0.1:9000
#
location ~ \.php$ {
try_wp-content/uploads $uri =404;
fastcgi_split_path_info ^(.+\.php)(/.+)$;
fastcgi_pass 127.0.0.1:9000;
fastcgi_index index.php;
include fastcgi_params;
}
# deny access to .htaccess wp-content/uploads, if Apache's document root
# concurs with nginx's one
#
location ~ /\.ht {
deny all;
}
}
[...]
In order to make nginx listen on port 80 IPv4 and IPv6, you need to uncomment both listen lines.
server_name _; makes this a default catchall vhost (of course, you can as well specify a hostname here like www.example.com).
Now, save the file and reload nginx:
/etc/init.d/nginx reload
Now visit the /var/www/phpvirtualbox/ directory...
cd /usr/share/nginx/www/phpvirtualbox/
and make the file config.php by creating the copy of it from config.php-example:
cp config.php-example config.php
Now start config.php and write down the password you made earlier for the vbox system user:
vi config.php
[...]
/* Username / Password for system user that runs VirtualBox */
var $username = 'vbox';
var $password = 'secret';
[...]
Open a browser and you can now access phpvirtualbox like this:
http://www.example.com/phpvirtualbox/ -
2

-
3
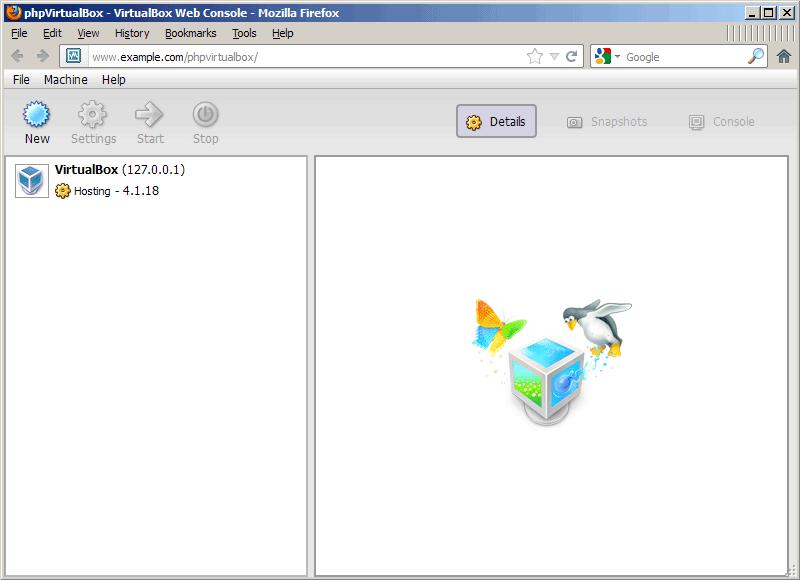
The below image features the interface of phpvirtualbox. It is mostly like the native VirtualBox GUI:

-
4
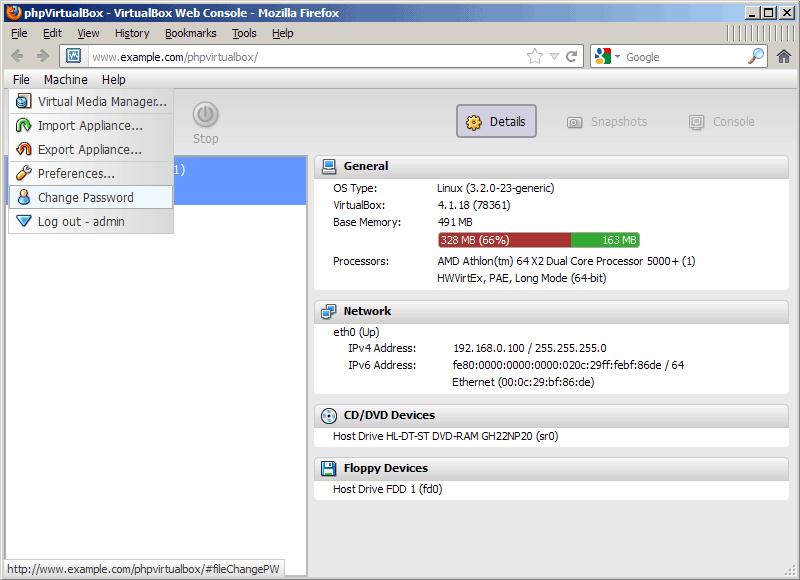
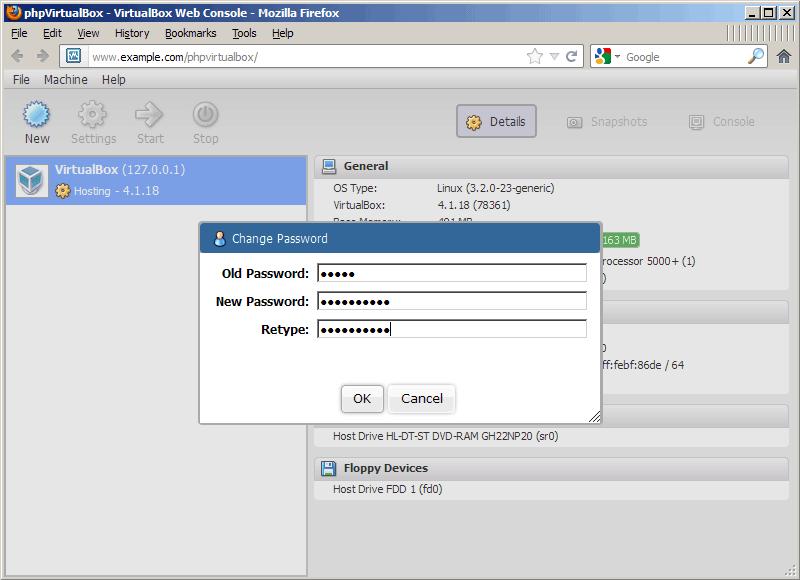
Now, you have to change the admin password on priority basis. Go to File> Change Password:

-
5

-
6
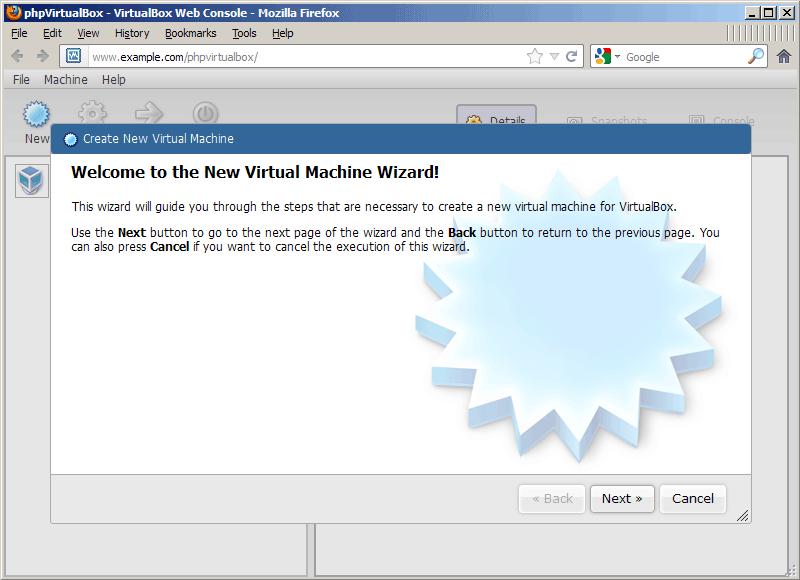
For all those who know how to use the native VirtualBox GUI, so phpvirtualbox becomes very easy for them as well. For instance, if you want to make a new virtual machine, a same wizard just like in VirtualBox GUI is available for you.


