How to Export Emails from Gmail

In this article we will learn how to export emails from Gmail. Gmail offers three ways of exporting emails: forwarding, POP(Post Office Protocol) or IMAP(Internet Message Access Protocol). These options are available in the settings of the gear menu in your Gmail account.
Forwarding option allows you to forward your emails from Gmail account to another email address. While with POP, copies of emails are created while deleting the originals from the server, and these emails are then downloaded to your computer (or any machine which you are currently using to view your Gmail account). Now these emails can no longer be accessed on the webmail.
With IMAP, user experiences a much better way of exporting emails because the emails are not deleted while exporting them to the email clients. Also using IMAP sync, these emails will be marked as read in the Gmail account if you have read them already through email client. IMAP is more robust which is why it is preferred over POP.
In order to export all your emails you have to follow the simple steps which are as follows:
Instructions
-
1
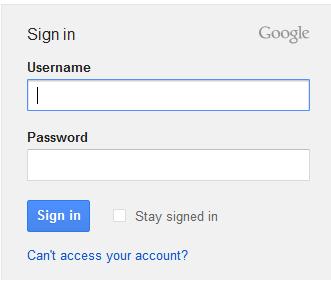
First of all you will have to Login to your Gmail account to export all your emails.

-
2
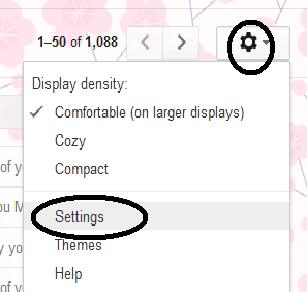
Once you are logged in, click the Gear menu on the top right hand corner of the page.
When you click the settings option in the gear menu, you will be routed to the settings page.
-
3
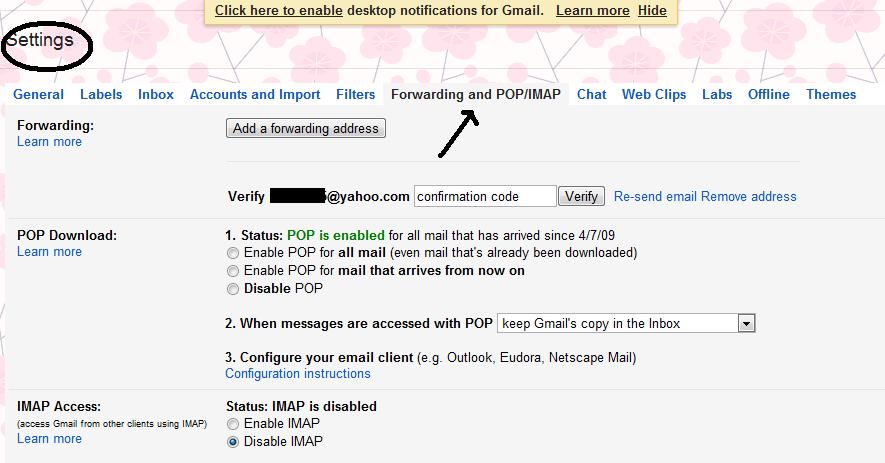
On the settings page there will be number of options on the horizontal menu bar. Now click on the "forwarding and POP/IMAP" tab from those tabs.

-
4
Forwarding:
If you wish to forward your Gmail emails to another email account, then you will select the forwarding option.
Select Add new email address and type in the email address which you want to send your Gmail emails to and then click next. The system will first confirm the forwarding address and if its correct then you will be allowed to proceed so at that time click the Proceed button.
Now that you are done configuring with forwarding your emails to the other account, go to that email account where you have routed the Gmail emails. Here you will find a verification email sent by the Gmail team in response to the configurations you have just made. Now click on the link inside this email.
Now in your Gmail account click the option ‘Forward a copy of incoming email to ’ and also select the email which you have just typed in to send your emails to.
Next, you can either opt to send a copy or you can send those emails to Trash. You are now done with forwarding your Gmail emails to another email account. Click to save changes.
NOTE: Only the emails that you have received will be exported with forwarding option.
-
5
POP(Post Office Protocol):
Another option is POP/IMAP. As stated earlier with POP, emails will be downloaded onto the machine and will no longer be accessed through the webmails.
In case of IMAP, emails are reserved on a server, and they can be accessed from any machine.
But first we will see how to export emails using POP option. Click the option "Enable POP for all mail" or "Enable POP for mail that arrives from now on" option, depending upon your requirement. Select the second option from the drop down menu. Again depending upon your requirements, select the third option with the name “when messages are accessed with POP” from the drop down menu.
Now save changes and configure your POP client. If you are facing any issues or donot know how to configure it just go to the link "Configuring Instructions" just below the third option.
NOTE: Only the emails that you have sent will be exported with POP option.
-
6
IMAP(Internet Message Access Protocol):
In order to export emails using IMAP, you will have to enable the IMAP status by selecting the Enable IMAP option.
Afterwards configure the settings for IMAP access according to your requirements and then click the Save Changes option.
Now that you have configured the IMAP access, configure the IMAP email clients.
For more information on how to configure the email client for IMAP follow the link to configuring instructions given underneath.


