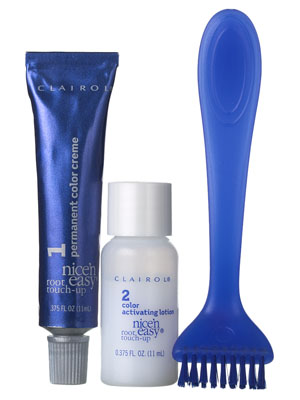
How to Use Clairol Root Touch Up

Colouring your hair can be a great way to keep things interesting, and experiment with new looks, but hair colour can have plenty of downsides too. The chemical components in hair colour mean that it is a product that should be used sparingly, so when it begins to fade at the roots, it is best to just keep touching it up at the roots to maintain it, as opposed to colouring all of your hair again and again. Clairol Root Touch-up is a prime product for this purpose, as it allows you to cover up any unsightly roots that do not go with the rest of your current hair colour.
Things Required:
– Shampoo
– Towel
– Clairol Root Touch-Up hair colour
– Comb or brush
– Old towel (to use while colouring)
– Wet paper towels
– Timer
Instructions
-
1
To begin, make sure you choose the right shade. Whenever you colour your hair, note down the shade, so that you can coordinate and make sure you use exactly the same shade for your root touch up – if you end up using a different shade, it will give you a very odd, mismatched look. For every hair colour, there will be general categories, like Red, Brown, Blonde, and Black, and under these, there will be a variety of sub-categories – e.g. under Brown, you are likely to find Mahogany, Deep Brown, Light Brown, etc. Choose wisely, making sure you match the colours exactly.
-
2
Now, begin the root touch up by shampooing your hair, to ensure that it is completely clean, without any greasy residue at the roots. Do not use conditioner or any styling products – the point is to have hair that is completely clean. Dry your hair, and then before you begin the colouring process, drape a towel around your shoulders, to make sure none of the colour gets onto your clothes or neck.
-
3
Perform the touch process in a place where you have a flat working surface, a sink, and a well-lit mirror available – a bathroom with ample counter space near the sink is perfect. Put the mixing dish on the counter, and then slip on the protective gloves that come with your hair colour kit.
-
4
Now, squeeze all of the “Colour Activating Lotion” into the mixing dish. Then, unscrew the cap off the tube of “Permanent Color Crème”, and squeeze all of this into the mixing dish too. Now, using your brush (also included in the kit), mix the two together until they are thoroughly combined.
-
5
Use a regular brush or comb to brush your hair in the style you generally wear it in – this way, you can locate where the roots are most noticeable. Now, load the colouring brush with a small amount of the hair colour you just mixed, and start applying it to the areas where the roots are most apparent. Colour all the roots in the part line, near the temples, on the hairline around the face, and all the way back to the crown of your head. Keep loading more colour onto the brush, and applying it to all the roots.
-
6
Once the colour has been applied to all the spots that need coverage, throw away any leftover hair colour, and set a timer for 10 minutes. If your hair is particularly grey or silver, set the timer for 15 minutes, at most. Keep tabs on the time, and do not exceed the limit. Once the time has elapsed, rinse all the colour out of your hair thoroughly, with warm water. After it has all been washed out, towel dry your hair, and style it as per your preferences.


