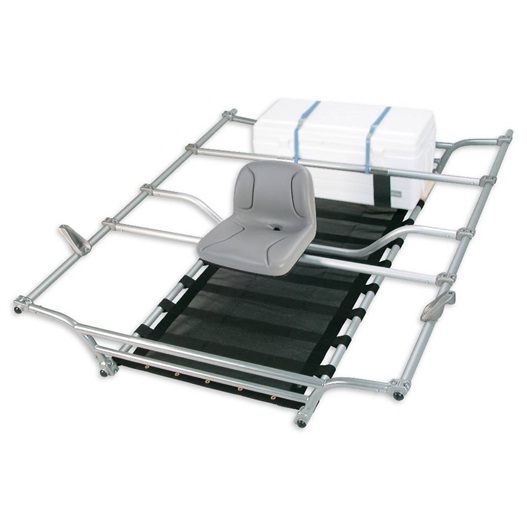
How to Build a River-Raft Frame

With summer knocking on the door, are you ready for a rocking and thrilling rafting down the refreshing river with your family and friends? Then you will have to arrange a river raft for this fun leisure activity. You can buy a river rafter from your nearest sport shop, but you can find it a bit expensive. Why don’t you build your own river-raft frame at home? It is not only budget-friendly, but very simple to put together. Simply collect the required supplies and start your project.
Things Required:
– Steel pipe
– Hacksaw
– Clamps
– Oar mounts
– Oar locks
– Plywood
– Screws
– 1 boards – about 8-inch
– Sandpaper
– Shellac
– Sand
– Carpet strips
– Straps
Instructions
-
1
Buy the Supplies
Visit your nearest your nearest home improvement store and buy the supplies required to build your river-raft frame. Make sure not to compromise on the quality of the required items as it is all about your safety while playing with the waves of the rivers. -
2
Finalize your Favourite Design
First of all finalize the design of your River-Raft Frame in order to start work on it. Check out the pre-built designs or simply get a sketch of the frame from the store from where you get the other supplies of the project. -
3
Cut the Steel Pipe
Keeping the required length of your river raft frame in mind, mark the steel pipe and use a hacksaw. -
4
Cut the Plywood
Use a handsaw or a hacksaw to cut two pieces of the plywood, keeping the desired length of the river-raft frame in mind. -
5
Attach the Plywood to Steel Pieces
Fasten the two pieces of the plywood to the steel pipe and secure them screws. Now use sandpaper to smooth the edges of the plywood’s pieces. -
6
Prepare Rails
Put together the two boards for rails and smooth out their edges, using sandpaper. Now coat the boards with shellac and then sprinkle some sand over the surface. -
7
Install the Seating Boards
Your river-raft frame is almost ready; place it on the ground with a level surface, install the two seating boards and secure and secure with some screws. -
8
Put in Carpet
It is the time to cover the point where the frame meets the raft. Place some strips over this connecting point and fix with some wood glue or adhesive. Leave it for some time until the glue dries completely. -
9
Set the Frame on a Trailer
Lift the frame with care and set it on a trailer. Put down the raft on top of the frame and then use some straps to grip everything down to the trailer.


