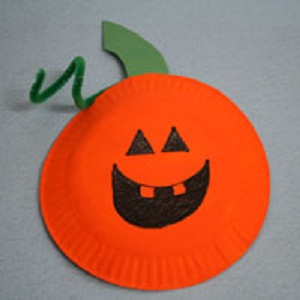
How to Make Paper Plate Pumpkins

There is no Halloween without a show of pumpkins. The orange color pumpkin faces are symbolic of Halloween and used as home décor around the festival. Halloween pumpkin decorations are readily available when that time of the year arrives. However, many people make their own decorations at home to add a personalized touch to everything. Real pumpkins can be used to make lamps and décor pieces to be hung around the house and give the party a blast. However, you can also use other materials like plastic and cardboard. One handy item lying around the house, especially in the party season are the paper plates. Paper plates can be conveniently used to make pumpkins, due to their deep round shape, synonymous with pumpkins. Our step by step fills on the details below.
Things Required:
– Large paper plate
– Orange and black craft paint
– Paintbrushes
– Brown and green construction paper
– Glue
– Scissors
– Hole puncher
– String or yarn
– Old newspapers or plastic
Instructions
-
1
Start working on a flat surface. Spread an old rag or newspaper to protect the surface beneath from cuts and paint splashes.
-
2
Place the large paper plate upside down on the flat surface, preferably a table. The deep side of the plate should be facing the table and the bottom should be at you. Now dip the paint brush in orange paint and paint the surface of the plate. Paint evenly, covering all parts. Once you are done, leave it to dry on the same surface, without any interference.
-
3
Check when the plate has gone completely dry. Now dip another brush in black craft paint and draw the pumpkin face features like eyes, nose and mouth. This part totally depends on you. The simplest pumpkin faces have triangular eyes and nose with a wide mouth.
-
4
The basic pumpkin face is ready. To make it more interesting, cut out a pumpkin stem out of a piece of paper. Glue it to the top of the pumpkin face. Cut two large leaves out of the paper. Glue them to the plate as well, on both sides of the stem. Let the glue dry before moving on so that the leaves adhere well.
-
5
Take a look at your pumpkin and make any adjustments you deem necessary. If you want to hang it somewhere, you can punch a hole in the stem and attach a yarn or string in it to use for hanging


