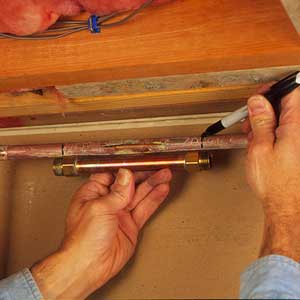
How to Repair a Copper Sweating Mistake

Home builders have been using copper pipes for residential and commercial water systems because the material is rot resistant and easy to use. Previously, a mixture of tin and lead was used to make water connections. Replacing lead and tin pipes with copper substantially lowers installation and labour costs. Soldering or sweating these pipes is an extremely easy task, only if you do it right. However, if you make a mistake while installing copper pipes, repairing them can be a troublesome and time consuming task.
Things Required:
– Pipe cutter
– Propane torch
– Adjustable pliers
– File
– Flux
– Lead-free solder
– Copper coupling
Instructions
-
1
Turn off the water supply to the pipe that needs repair. If the pipe does not have a specific valve, shut off the water supply to the entire house.
-
2
After you have cut the water supply to the pipe, drain the line by turning on a faucet at the end of the line. If you fail to find a suitable tap, using a cutter, sever the line about a foot from the joint that needs repair.
-
3
Now, ignite the propane torch, adjust it to a medium flame and heat the joint with the tip of the inner blue flame. Remember to hold the pipe firmly with a pair of adjustable pliers to ensure that it does not slip.
-
4
When the solder begins to melt, pull the pipe out of the joint.
-
5
Allow the pipe and the assembly to cool for 20 to 30 minutes.
-
6
Once the pipe and fitting are cold enough to handle, file them thoroughly with sandpaper to clean the outside of the pipe and inside of the fitting.
-
7
After having cleaned the assembly properly, spread flux on the outside of the pipe and inner side of the fitting.
-
8
Insert the pipe into the fitting and heat the joint with the propane torch.
-
9
Remove the torch once the flux begins to boil and coil a lead-free solder around the circumference of the pipe. The solder will melt and seep into the gap.
-
10
Let the workplace cool then close the faucet that you had turned on. Open the water valve and check the repaired area for any leakage.


