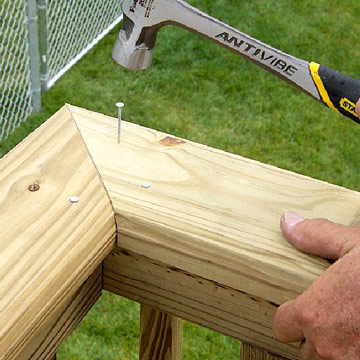
How to Add Rails to a Deck

Any deck over 2 feet tall has to be covered completely with wooden rails before it can be used as a stage for a dance or barbeque party. Since a guest toppling off the side is the last thing you would want during a gathering, it would be a good idea to add a few guardrails which will mark the boundaries of the deck very prominently.
Things Required:
– 4″ x 4″ posts
– Galvanised deck screws
– 2″ x 4″ lumber
– Power drill
– Handsaw and circular saw
– Fine grit sandpaper
– Wood sealer
Instructions
-
1
Decide an intended height of the railing. Generally, it ranges from 3 to 4 feet and handrails add an inch or two. Railings shorter than this in terms of height can cause a hazardous situation.
-
2
Ideal distance between consecutive posts is about 8 inches. However, it can be reduced to 4 inches or less if children would be using the deck. Determine the perimeter of the deck in order to determine the number of posts you will require. Accordingly cut 4" x 4" posts and set them aside.
-
3
If the surface of the deck extends beyond the framing, use a tape measure to determine the exact spot where a post would be mounted. Mark these spots by drilling holes with a handsaw. This way, you will be able to attach posts to the framing in a perfect manner.
-
4
The best way to give a decorative look to the posts is to slice the bottom front edge of all of the posts at an angle of about 45 degrees. Alternatively, it is possible to create a proper design by using a router.
-
5
Install galvanised deck screws at a distance of 2 inches from each other in order to mount railing posts to the frame of your deck. The indentation will prove helpful if you plan to notch the surface of the deck.
-
6
Cover the entire perimeter of the deck by screwing 2" x 4" supports to the outside top edge of each of the posts. Be sure to space posts at the top and bottom equally before fastening them at all the intersections using 2 deck screws for each support.
-
7
Finally, place a piece of 2" x 4" lumber cap on top of the support you installed in the previous step. The 2" x 4" lumber cap acts as the handrail which can be further extended if desired by means of 2" x 6" boards. To prevent the surface from becoming uneven, screw the cap and then countersink the heads. Use a fine grit sandpaper to make the surface of the rails as smooth as possible and use wood sealer if necessary.


