How to Backup MySQL Database with phpMyAdmin

phpMyAdmin is an open source tool written in PHP intended to handle the administration of MySQL over the World Wide Web. It enables user to interact with their MySQL databases and so you can easily backup your WordPress, Joomla. VBulletin and other MySQL databases using phpMyAdmin. Using phpMyAdmin for small database backups is extremely handy, but you need to know all the details in order to avoid any inconvenience.
This guide will provide you step-by-step instructions to find phpMyAdmin on particular server and backup your databases efficiently.
Instructions
-
1
Locate phpMyAdmin in your hosting panel
Locaiton of phpMyAdmin is different in various hosting panels. Some of the most popular panels are listed below.
In cPanel
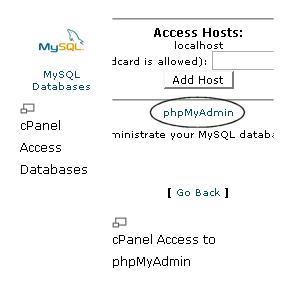
Login to cPanel and you’ll find phpMyadmin right under Databases.
In Direct Admin
You will find MySQL Management on Your Account page. Click on MySQL Management, so that you can have access to phpMyAdmin.
Ensim
You will see the MySQL Admin logo. Click here and it will open a new window. Here you will have to choose MySQL Administration Tool to access phpMyAdmin.
In Plesk
Look for Databases tab and you’ll find phpMyAdmin under it.
In vDeck
Once the control panel is visible and the “Host Manager” can be seen, click on that. After that click Databases. Then, click Admin on the next window. It will open another window, and you will have the access to the phpMyAdmin login screen.
In Ferozo
Now you have to login Ferozo Control Panel sagaciously. Once you are logged in, look for the menu Bases de datos (Data Base). Now click on the second option i.e Acceso phpMyAdmin. A new window will exhibit phpMyAdmin login screen.

-
2
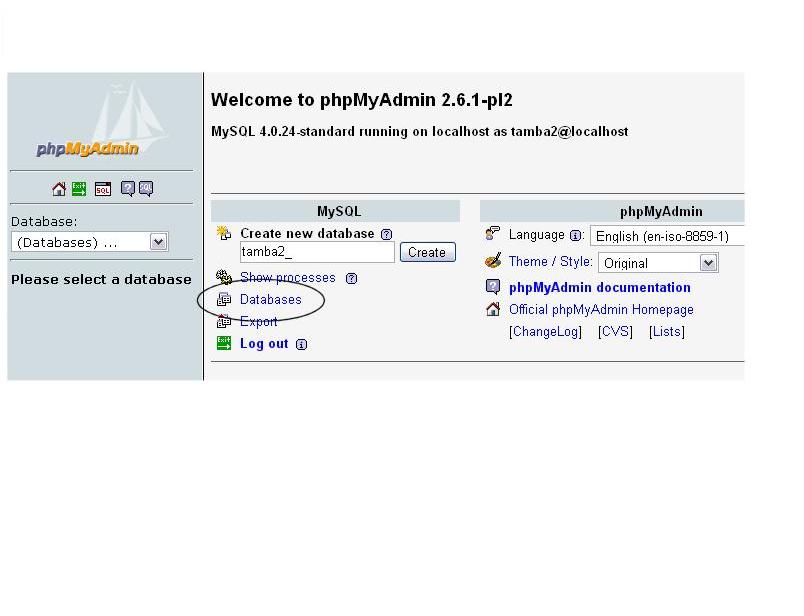
Once located the phpMyAdmin and clicked on it, you’ll be redirected to a new page. Locate ‘Databases’ on this page.

-
3
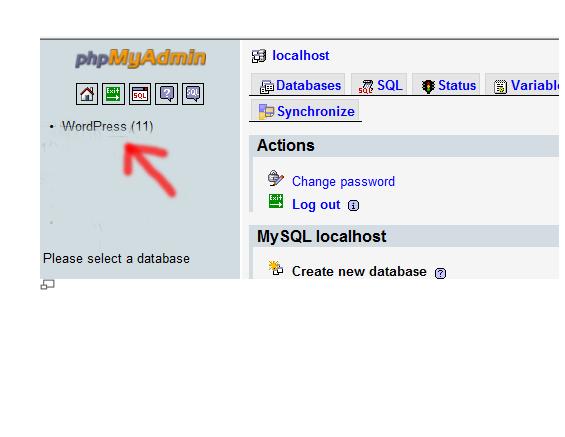
You may have just one or multiple databases in left column. Select the desired database.

-
4

-
5
Check Structure and Data options. Both options have some further checks, go through them in detail and see if you need to check or uncheck anything else.

-
6
Select SQL format in the left column.
-
7
Check Save File as ‘Name it’
-
8
Select Compression none
-
9
Press go and your database will start downloading to your desktop.


