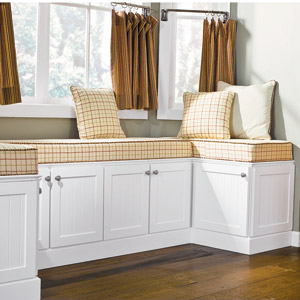
How to Build a Bay Window Seat with Storage

A bay window seat with storage is one of the most beautiful and valuable addition to your room. It doesn’t only make you room look good, but it also provides a great capacity to store your things which you can easily access at any time. It is not difficult to build a bay window seat with storage. All you need is a little bit time, some tools and materials. You can take assistance from the given steps to build your own bay window seat with storage.
Things Required:
– Drill/driver
– Clamps
– Finish nailer
– Tape measure
– Level
– Thin prybar
– Caulking gun
– Stud finder
– Counter-sink drillbit
Instructions
-
1
First, you have to create a design for your bay window seat. Take all the necessary measurements carefully and figure out the best place for the window in your room.
-
2
You have to include a seat which has storage capacity beneath it and also contains a separate section for keeping your shoes.
-
3
Use plywood to build your seat. You should use guides to cut the plywood in the right directions, otherwise your seat will look awkward.
-
4
Connect the ends of the wood cuttings to the bottom of the seat and clamp it well. You have to use glue and nails in order to secure the ends. Use the nails with the right size, neither long nor short.
-
5
Now, you have to cover up the front corner of the edge with the help of solid wood. After that, measure and mark the places where you want attach the biscuit on the solid wood and the plywood.
-
6
You can also make slots in the solid wood and plywood to attach the biscuit. Apply wood adhesive to all the ends and in the slots to connect them well. Then, insert the biscuit into the slots and compress them well for a while so that they may get attached with each other.
-
7
Build a recessed base for the seat, glue the strips from the top corners and nail them afterwards.
-
8
Make a triangular base and a shelf to create the end tables for your bay window seat. Then, glue and nail them properly.
-
9
Inspect all the things in the ends and make the final adjustments (if required) and attach the hinges to the bases and lids.


