How to Build an Audio Amplifier

An audio amplifier looks like a small piece of metal, but only its builder knows how complex the inner system is. You need plenty of skills, patience and dedication to build an audio amplifier.
Several parts combine together to make an audio amplifier. It is imperative that each tiny part is fitted properly, because even if there is a minute issue with the smallest part, nothing will work.
Components Required:
– LM 386 semiconductor (IC)
– 100 micro Farad capacitor
– 220 micro Farad capacitor
– 10 ohm resistor
– 5 kilo ohm variable resistor
– 100 ohm variable resistor
– 0.01 capacitor
– 0.047 capacitor
– Wires
– 9V Battery clip
– 9V Battery
– 3.5mm stereo jack male
– 3.5mm stereo jack female
– Project board
Instructions
-
1
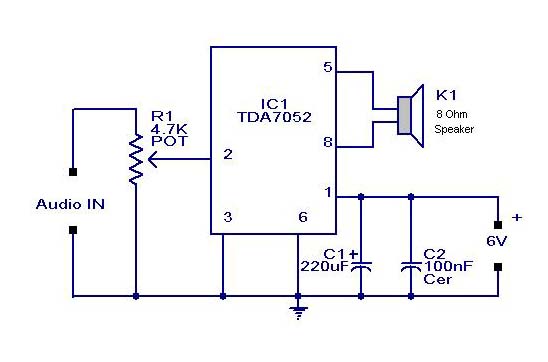
Circuit Diagram
First of all, you need to decide which circuit you are going to make. For this, you need a circuit diagram. -
2
Placing IC
Keeping track of the circuit diagram, place the LM 386 in the project board. An IC has many pins, and the pin number increases anticlockwise. Join the third and fourth pin with a wire. -
3
Capacitor
Now, join the capacitor to IC. One pin of the capacitor should be joined with the second pin of ICC, while making sure that the other pin of the capacitor is joined with the INPUT. -
4
Gain Controller
Join the A pin of the 5k ohm variable resistor with the very first pin of the IC. If you are holding the ICC in front of you, the lower left pin is the first one. -
5
100 Micro Farad Capacitor
Make sure that the ICC is connected to all the components. Now, it is the time to join the +ve side of the 100 micro Farad capacitor with 6th pin of the IC. Similarly, the –ve side should be attached with the fourth pin of the IC. -
6
OHM Resistor and 0.047 Capacitor
Attach one side of OHM resistor with the fifth pin of the IC, and the other side with the capacitor. The fourth pin of the IC, also known as GND pin, should also be attached with the second pin of the capacitor. -
7
Volume Controller
Making a volume controller is tricky. While the fifth pin of the IC is attached with the +ve side of the micro farad, the –ve side should be joined to the A pin of the resistor. Make sure the B pin of the resistor is connected to the GND pin. -
8
Input and Output
In this step, connect the +ve pin of the stereo jack female with the C pin of the resistor. Also join its fourth pin with the GND pin of the IC.
The +ve side of the stereo jack male must be connected to the capacitor. Meanwhile, its GND pin must have a link with the fourth pin of the IC. -
9
Testing
It is always a good idea to start building an amplifier under the guidance of an expert. Even if you have made a fine amplifier, you may damage it while testing. Testing the amplifier is an extremely important step.
The best way to test an amplifier is to connect the +ve of the 9V battery with the sixth pin of IC, while linking the –ve of the battery to the fourth pin of the IC.


