How to Build Raised Vegetable Garden Boxes

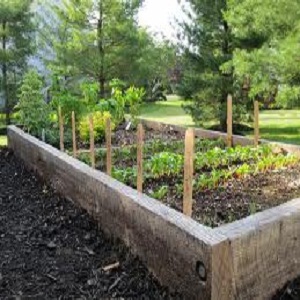
Growing your own vegetables has a lot of fun and benefits to it. Not only can it turn into a good hobby, it supplies the family with fresh vegetables and you are sure about their source. The trips to market are also reduced and you get a great pastime hobby. Vegetable boxes are helpful if you have soil issues i.e poor soil content, PH problems which do not allow good quality vegetables to grow. These boxes let you decide your own soil and grow in it. They also help you in making distinct patches for different types of vegetables although you can also grow many types in one large box. This is a task you can do on your own at home at a weekend. Our step by step guide tells you exactly what to do.
Things needed:
– wood boards
– Hand saw, square, carpenter’s level, mallet (or sledge), screwdriver, hacksaw, drill, screws.
Instructions
-
1
Choose the area:
Since vegetable need a lot of sunlight, choose an area which remains sunny for most of the day and where you can extend a water supply easily. Decide the size of your box according to the area available.
-
2
Material and measurements:
Wood is normally used for most raised boxes because it is easily available and relatively cheap. However you an also use concrete blocks . Most people prefer using cedar wood as it is rot resistant in the constant supply of water. You will need four planks. Decide if you want to make a square or a rectangular shaped box. You also have to decide the size and height of your box. Most boxes have a height of 6 inches If you want to add more height, use stakes / cross support as the pressure of the soil on the structure increases. Normally boxes are not wider than 4 feet so that the hands can reach over to the vegetables in any corner easily.
Make sure your frame is level in all directions. This is a necessary step because if your bed is not level, all the water will run off to the lower part. Also level your soil well in all directions.
-
3
Construction:
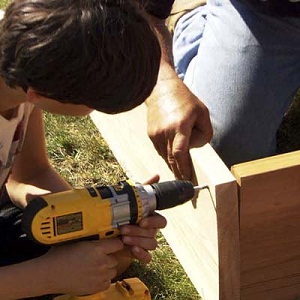
Cut the planks using a saw and bring them to the selected area. Join them together using screws. You might need to drill a bit. While joining the plank edges, you can make one side longer then the other so that they overlap and it is easier to nail them together.

-
4
Stakes:
For perfect orientation and extra support you can build stakes for the frame. Cut out four rectangular wood slabs. Make one of the sides of each pieces pointed by sawing diagonally. Dig this pointed side into the ground in a way that the slab supports the box structure behind it. Secure each stake to the frame using screws.
-
5
Soil and seed:
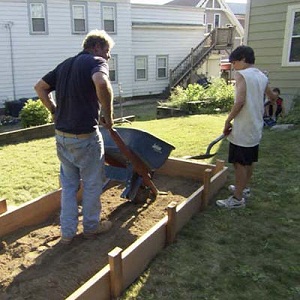
Dig out the soil underneath so that the level is the same. Tile the soil well and remove any weeds. Now is the time to fill it with it with the soil of your choice. Using a wheelbarrow and a shovel, fill the bed with soil until it raises just above the boundary height. Level the soil out with the shovel and prepare it to be sown. Mix in the appropriate amount of fertilizer.
Dig a small hole for seed in your garden box using fingers or a rod. Put a seed into each hole and cover with a layer of soil so that are not scattered or picked up by birds.


