How to Convert an Address List in Excel Into Address Labels

Microsoft Excel is a great program to enter and manage address data. However, when it comes to printing the data to label paper, it becomes really difficult to align the date and properly get it printed. Here, you will need to convert your address list to address labels, by using Microsoft Word. The process of converting the data is a bit tricky. However, it appears difficult when you try it for the first time. Thereafter, it becomes really easy for you to apply the whole process in just few seconds.
Instructions
-
1
Buy label paper from the market and note down the label identification code, which you can find at the front or the back of the package. Before you buy the label paper, make sure that the paper is compatible with MS Word.
-
2
Save the Excel file in your computer, at a location where you can find it easily. Before saving, make sure that all the entries are placed in the corresponding columns, such as First Name, Last Name, Street Address, City, State and Zip code.
-
3
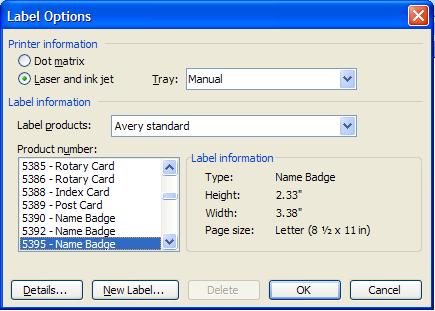
Open MS Word and create a blank document. Now select "Start Mail Merge” from “Mailings” tab, present at the quick access toolbar. A list will now appear in front of you. Click “Labels”, and you will see a new dialog box appearing on your screen.
-
4
You will have to select the vendor, from the "Label Vendors" drop-down menu. Select the vender name of the label paper you purchased from the market.
-
5
Now select the label identification code, which you noted down from your label paper’s package, from the "Product number" list. Click “OK” to continue.
-
6
Click the “Select Recipients” button, located right besides the “Start Mail Merge” button. Select "Use Existing List" from the drop-down menu, and locate the Excel file which you save on your computer.
-
7
Now move your cursor to the first label, and click "Insert Merge Field”. All of your columns from the Excel sheet will now be shown in the form of a list. Choose the fields one by one and position them in the labels, according to your needs.
-
8
Click “Save As”, from the “File” menu, and select the location where you want to save your file with labels.
-
9
From the Mailings tab, click the "Update Labels" button, and you will see < > written in front of each label in your sheet. Click "Finish & Merge". You should now click the "Edit Individual Documents," and enter the records which you want to merge with the labels sheet, and click “OK”. The MS Excel and MS Word sheet is now linked with each other.


