How To Copy Photos to a DVD Using Windows XP

DVDs serve a lot of purposes in your daily life. You can store a variety of data on DVDs such as movies, songs, pictures etc. If you want to share your photos with family or friends, or if you are looking for a medium to save your photos and keep them as memories, use a DVD.
Even though copying photos to a DVD is not a very simple thing, but still it is something that you can do easily following a few simple steps.
Instructions
-
1
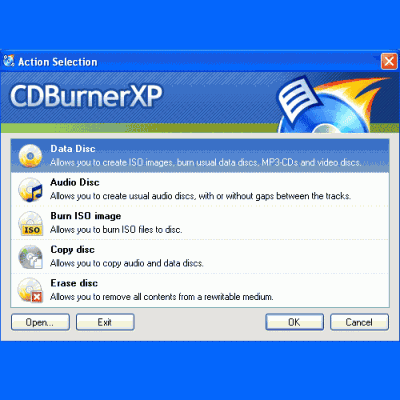
The first thing you need is CD/DVD burning software for Windows XP. There are plenty of free softwares available on the internet for free download. Choose a CD/DVD burning software that you think is convenient for you to use. Download it from the internet and install the programme in your computer. Common examples of CD/DVD burning software for Windows XP are CDBurnerXP, ExpressBurn, DeepBurner etc.
Image courtesy: kat.ph/free-cd-burning-software-t4319117.html
-
2
Now you need a writeable DVD. Insert the writeable DVD into the computer’s DVD RW drive. Not all DVD ROMS have the capability of burning DVDs. If you have multiple DVD drives and do not know which one has the capability to burn DVDs, look for the words ‘RW’ on the drive.
Windows XP may pop up a window prompting you to select an action that you want to perform. Just ignore or cancel the pop up screen. -
3
Open the CD/DVD burning software that you installed earlier. You will see a number of available options. Choose an option similar to ‘Create a new Project’. Then choose an option similar to ‘Data Disc’.
-
4
After that you will be prompted to select the data that you want to burn on the DVD. From the interface of the CD/DVD burning software, browse to the directory that has your photos in it. Select all the photos that you want to urn on the DVD. Although most CD/DVD burning softwares will warn you if you are running out of disc space, still you should keep an eye on the available disc space.
-
5
Now you need to specify the disc on which you want to burn the photos. Select the drive in which you inserted the blank DVD and click ‘Burn’.
Ideally, it will not take too long to burn the photos on the DVD. But you may have to wait longer than expected if the data you are burning is close to the maximum available disc space. -
6
When the 'Burn' process is complete, your DVD is ready and all the photos have been successfully burnt on the DVD.
Image courtesy: iconfinder.com


