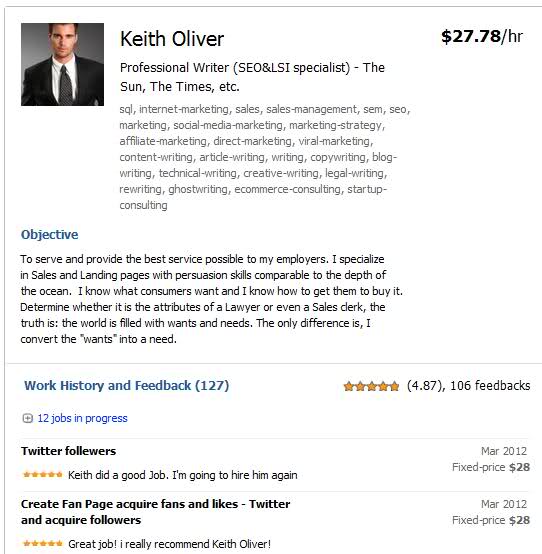
How to Create a Great Profile on Odesk

Odesk is one of the leading online contract-based employers on the internet. It is also the most reputable when it comes to number of similar platforms in the same field.
In essence, Odesk is nothing more than a place where contractors can get in touch with and hire potential candidates for certain time-based contracts. The work can range from coming up with Marketing Plans to providing content for websites and a plethora of other options and features that make working from home not only an attractive option but potentially a very lucrative one.
however, before anyone jumps in and begins their journey to potentially earning thousands of dollars a month, it is important to get the first step out of the way and that first step is none other than creating a profile on Odesk.
There is a catch though, as the profile needs to stand out from over a million others but with our step by step guide, it won’t be long before your profile becomes a shining beacon in a sea of darkness.
Instructions
-
1
Humble Beginnings
After signing up for Odesk and confirming your email address you can begin creating your profile. The first step is click on the ‘Create Profile’ button, which will appear on the screen. Pretty obvious work so far but the next step is where it gets interesting -
2
Multiple-Choice Naming
Based on the heading of the step, one should understand that this where the name for the profile are added. Users will be given two options to choose as their Display Name and it is up to your discretion which one you prefer. -
3
Say Cheese
Add a profile picture here by clicking on the upload link and selecting a file from your computer. It is highly recommended that the picture look both professional and be real. A flamingo flying into the sunset may look pretty but from an employer’s point of view it is as attractive as raw broccoli. -
4
Title and Objective
Add a title and objective statement here. Try to keep it brief and precise. Your life story is not what is required, only the elements of the story that can land you projects. It is best to talk about a specific set of skills and just how brilliant at them you are. -
5
Setting your Price
This is the tricky bit. For new writers it is important to remember that a low rate is more advisable. However, as your experience and reputation increase, the rate can always be increased later on. -
6
Getting Technical
Add your level of English from the options and be honest as your future contracts will depend on it. Choose the various categories based on your skills and set your visibility to ‘Everyone’ -
7
The Final Hurdle
You’re almost done! Fill out the remaining details, which will be needed for payment and viola...you now have a shining beacon of an Odesk Profile!


