How to Create and Print Free Valentine Cards

Making your own Valentine cards can be a great idea considering the fact that Valentine cards bought from a local store are often impersonal and fail to express the right message to your loved ones. If you have a computer, a coloured printer and a few pieces of card stock at your disposal, it will take about an hour at the most to design and print free Valentine cards, decorated with your favourite clip arts, photos and a personal message for your loved ones.
Instructions
-
1
To design the Valentine cards, use any word processing software such as Microsoft Office Word. Open a blank word processing document in the software of your choice to start creating the Valentine cards.
Image Courtesy: technicallyeasy.net

-
2
By default, layout of the blank page will be set to ‘Portrait’. You need to change the page layout to ‘Landscape’. If you are using Microsoft Office Word, click on the ‘Page Layout’ tab on the top of the window and then under the ‘Page Layout’ tab, click on ‘Orientation’. Choose ‘Landscape’ from the two available options.
-
3
Under the same tab, click on the ‘Columns’ option and select ‘Two’ from the drop down list which appears. This will divide the blank document into two separate columns so that you can fold the card printed card stock to make it look like a Valentine card.
-
4
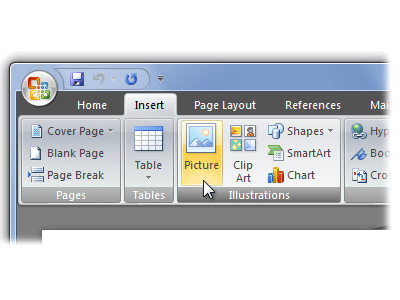
Choose a picture or clip art image that you will like to print on the card. Use the column on the right for this purpose. Under the ‘Insert’ tab on the top of the menu bar, click on ‘Picture’ if you want to add a picture to the card. A dialogue box will pop up prompting you to locate the picture. Navigate to the location in your computer where the picture you want to add to the card is saved, select the picture icon and click the ‘Insert’ button on the dialogue box. Resize the inserted picture according to your choice by dragging along the corners of the picture.
Image Courtesy: eclipsecrossword.com

-
5
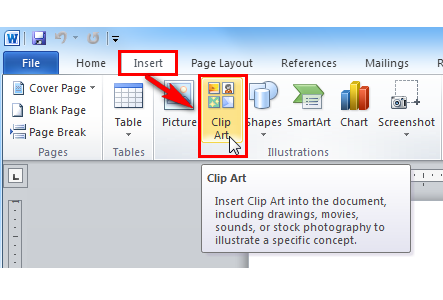
Alternatively, you can add a clip art image by selecting the ‘Clip Art’ option under the ‘Insert’ tab. Microsoft has a number of default clip art images. Choose the one that you would like to appear on the Valentine card by clicking on the ‘Go’ button in the right hand pane of the screen. For thousands of clip art images, you can also search online. Resize the clip art image by dragging along its corners.
Image Courtesy: oakdome.com

-
6
Above or below the picture or clip art image, add the message that you want to convey. Choose font colour, size and style of your liking from the ‘Font’ section under the ‘Home’ tab.
-
7
On 8.5 inch by 11 inch card stock sheet, print the card front and back. Again go to the word processing document and in the left hand column, type a message that you will like to be printed on the inside of the Valentine card. Remove the printed paper from the printer and flip it vertically. Place it back into the printer and print again.
-
8
Finally, to give the card stock sheet the form of a Valentine card, fold it in half. You have successfully created and printed a free Valentine card.


