How to Do Basic Colour Correction

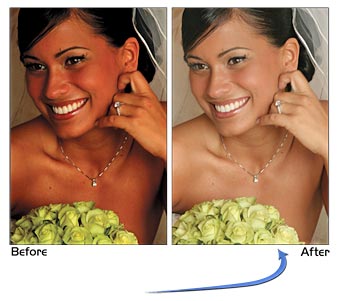
Colour Correction is a technique that’s deemed as necessary by some people, as it helps in enhancing the quality of the image. Colour Correction is all about creating the right RGB (Red, Green & Blue) ratio in the image. Such tools are available in almost every image processing software. Whether it maybe Adobe Photoshop, Final Cut X Pro or even Windows Image Viewer, every popular software has applications that can help you in performing basic colour correction.
Instructions
-
1
Open the program that you would be using for the colour correction. There are many softwares that you can use to apply colour correction to your image. However, Adobe Photoshop is one of the most used image processing software. Once you’ve opened the program, click on ‘File’, and then click on ‘Open’. Browse the image that you want to process, and select it to open in the program.
-
2
Select ‘Levels’ from the toolbox to enhance the colours. Use the Levels tool to change the white & black levels of the image. There are three main sliders in the tool. The one of the left is for the shadows, the left one for the highlights and the middle one is for the midtones slider. Below that there is another slider which is used for darkening and brightening the image as per your need.
-
3
After that, select the ‘Curves’ tool from the toolbox. This tool can help in bringing out the colour’s in the image. The curves induce highlights and the shadows in the image, which gives it a better outlook. The curves are often used to bring out the dim colours of the image, or for the purpose of simply highlighting a particular subject.
-
4
Once you’re done changing the levels & curves, you can then move onto ‘Colour Balance’. Select the tool from the toolbox and drag the cursor to adjust the colour settings. It’s not a very flexible tool but that it can provide you the minor adjustments that need to be done. Make sure that the objects in the image don’t reflect any particular more than necessary, as it makes the image look unnatural.
-
5
If you want to enhance a particular colour in an image, you can use the ‘Selective Colour’ tool. This tool helps in highlighting a specific colour in the image. If the image is unable to show the true concentration of one colour, use the tool to relatively increase that.


