How to Install a Glass Block Window

Glass blocks are used just like bricks to walls and windows in a creative way. They allow light to pass through with just the right amount of privacy making them perfect choices for shower walls, bathroom windows and equally good anywhere else. You can install your own glass block window by using mortar to build it up. The process is simple, easy and rewarding because in the end you will be staring at a marvelous window. We have assembled everything for you from the materials needed to the finishing touches in our step by step guide below.
Things required:
– Glass blocks
– Plastic tracking
– Jointer
– Spacers
– Screws or nails
– Hammer or screwdriver
– Anchors
– Caulk
– Silicon sealant
– Caulk gun
– Cleaning cloths
– Level
– Glass mortar
Instructions
-
1
Measurement:
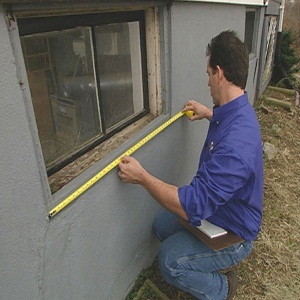
Measure your window opening from the outside. Note its height and width. It will help you get an idea of the number of blocks you require to cover it. Usually thinner blocks are used in the windows. Since blocks cannot be cut, you have to look for ways to do with whole blocks and fill up any remaining space with wood or any other material. Also account for the spaces between blocks and that between them and the wall.
-
2
Lay tracking:
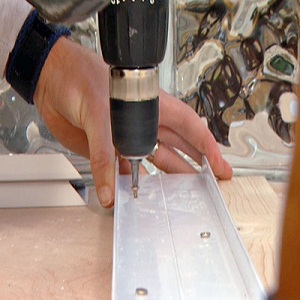
Cut plastic tracking to the length of the four sides of the window. Arrange the tracking in a way that the cut out section is at the top. Lay this tracking on the window using screws. It is better to drill pilot holes first. The tracking plays good foundation for your wall. Tracking is also known as glass block channel.
-
3
Install blocks:
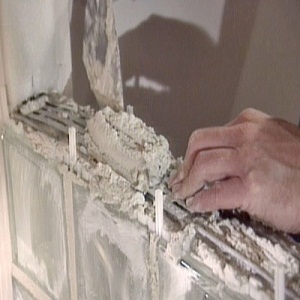
Make glass mortar according to instructions. The mortar will be your glue to hold the blocks. It should be neither too thick nor too thin and runny. Lay a thin line of mortar on the surface of the bottom tracking. Start by placing the first block in a corner. Place a spacer on its side and place another block snugly. For every block, apply mortar to the side that will be closest to the next adjacent block. Keep doing it by placing blocks and using spacers until you fill out the first row. Place the second row and the others in the same manner until you are done with the whole window. Use a level to ensure that your blocks are even. Wipe off excess mortar.
-
4
Seal the blocks:
Use a putty knife to apply silicon sealer to all the joints. Start horizontally, applying between the blocks and than process vertically. Use old clothes to wipe off excess silicon. When you are done with blocks, apply caulk to the space between the blocks and window frame to ensure a tight fit. A thick line of silicone caulk keeps the whole system intact for long. This caulking should be around the perimeter of the window.


