How to Install a Programmable Thermostat

Changing weather conditions require you to make certain adjustments to keep your house comfortable. Specific devices are used for keeping the houses warm and cool, as required by the prevailing weather conditions.
Thermostat is also one of such devices which adjust the temperature by responding to the surrounding environment. A programmable thermostat actually adjusts the temperature of the surroundings according to a series of settings that take effect at the different times of a day. It can be a really useful device to maintain a steady temperature at your home/workplace without making changes again and again.
Once you have programmed the settings, the thermostat will automatically keep adjusting to temperature variations all day long.
Installing a programmable thermostat isn’t a hard task at all. All you need to do is remove the old thermostat and attach the new one to the existing wires. However, you have to take care of the colour codes of the wires while connecting the programmable thermostat to the wall plate.
Things Required:
– Programmable thermostat
– Drill and bits
– Screwdriver
– Wire stripper
Instructions
-
1
Before you set off to install the thermostat, make sure to cut off the power supply of your house from the breaker box. This step is extremely important for your safety and you have to be absolutely sure that the power of your house is completely shut down before you come in contact with the electric wires.
-
2
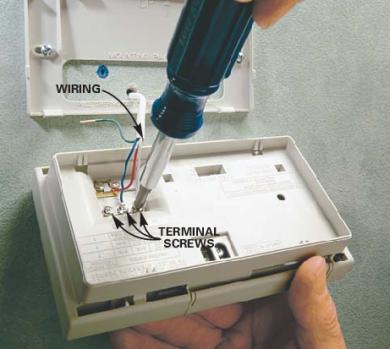
Now take off the outer cover of the old thermostat and examine the wires connected inside it. Normally, there are 4 to 5 wires of different colours and you need to unscrew all of them with a screwdriver.
-
3
You will find stickers along with the new thermostat. Label all the wires of the old thermostat with those stickers so that you can remember which wire is to be connected to its respective socket.
-
4
Remove all the screws with the screwdriver and subsequently, remove the old thermostat from the wall.
-
5
Remove the outer cover of the programmable thermostat and pull the wires through the middle of the wall plate to the thermostat. Use a drill machine to carve holes and then attach the new plate to the wall. Make sure to tightly screw the new plate to the wall.
-
6
Use a wire stripper to expose ¼ inches of the wires. Using the manufacturer’s manual as a guide, insert each coloured wire into its respective connector. Tighten up the screws to affix the wires properly into their position.
-
7
Replace the cover of the thermostat and turn back the power of your house from the breaker box.


