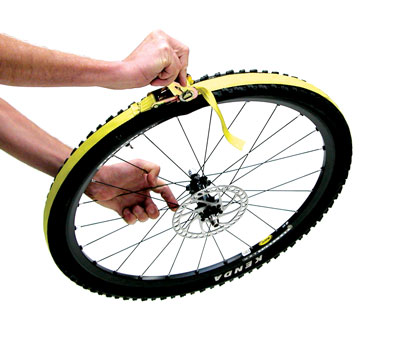
How to Install a Tubeless Tire

Riding mountain bikes is a hobby for many people and advanced technology has made it very convenient. With the advancement of technology, tubeless tires are commonly used in all mountain bikes which are much better than tubed tires, which can burst easily.
However, tubeless tires can get punctured as well, and when they do, many riders get in trouble as they do not know how to install a replacement. Luckily, the process is quite easy if you follow it in a proper sequence.
Things Required:
– Tubeless tyre
– Tyre wheel
– Tube conversion kit
– Safety glasses
– 7/16″ drill bit for schrader valve
– Small hand file that can fit into valve stem hole
– Rim tape
– Floor pump or air compressor
– Large brush with soft bristles to apply the soap and water solution
– Plastic tyre lever
– Cardboard box that should be opened from the top
Instructions
-
1
First of all you need to remove your wheel and tube from your mountain bike's rim. You can install the tubeless tire on your existing rim as well but in this case you will have to use a rim tape which will protect the tire from the rough surface and spoke edges.
-
2
If you are going to install a tubeless tire on a non-tubeless tire rim, you need to enlarge the valve stem hole according to your requirement. If you have a tubeless tire rim, this step should be ignored.
-
3
Enlarge the inside valve stem hole only up to 3/8”. Remove all the metal fittings from the hole. The valve stem needs to be enlarged to make the inflation easier.
-
4
After doing this, you need to install the rim strip inside the rim. However, before it, you should wash the rim with a regular detergent or soap so that rust and other small objects may come off. Meanwhile you need to stretch the strip evenly around the rim to divide the pressure equally.
-
5
Now hang the wheel with the valve stem by holding it firmly and keep it inflated until it gets adjusted appropriately into the bead.
-
6
In the next step, you need to add sealant to the rim strip. Before adding the sealant, shake the bottle well to make a good mixture of it. Use your finger tips for spreading the sealant over the rim strip.
-
7
In the last step you need to check whether the sealant has been applied correctly. Use the hand pump or air compressor to gauge the air pressure and your task will be done.


