How to Install Apache2 with PHP5 And MySQL Support on CentOS 6.1

In today’s world of latest technology, there is abundance of servers easily available in the market. Apache, also known as Apache HTTP Server, is one of those servers. It is basically a web server software, famous all over the world of technology for playing vital role in early growth of the World Wide Web. Apache2 is the upgraded version of this server software, which is a kind of open source program; you can edit it and improve it. Moreover, you can normally get it free of charge. However, Apache 2 would not be the end of the development of this web server software as this program is expected to develop better in the future with the help of millions of users all across the world. You can now install an Apache2 web server on a CentOS 6.1 server with PHP5 support (mod_php) and MySQL support.
Instructions
-
1
Install MySQL 5
First of all install the MySQL 5, a relational database management system (RDBMS) that runs as a server in order to endow a number of databases with a multi-user access. In order to install the MySQL 5 in your system, simply do this:
yum install mysql mysql-server
After that, you have to create the system startup links for MySQL and just set up the MySQL server:
chkconfig --levels 235 mysqld on
/etc/init.d/mysqld start -
2
Install Apache2
Now, it is the time to install Apache2, which is easily available as a CentOS package. Therefore, you can install it in this manner:
yum install httpd
At this time, organize you system in order to start the Apache at boot time:
hkconfig --levels 235 httpd on
Now, start Apache like this:
/etc/init.d/httpd start
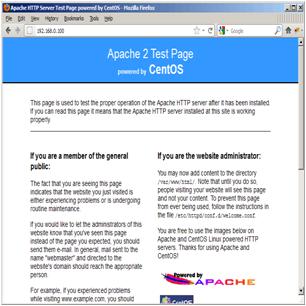
After that, direct your browser to http://192.168.0.100, and you should see the Apache2 placeholder page as shown in the image on your right hand side.
Note: The Apache's default document root is /var/www/html on CentOS and the configuration file is /etc/httpd/conf/httpd.conf. Secondly, the extra configurations are stored up in the /etc/httpd/conf.d/ directory.
-
3
Set up PHP5
The method for installing the PHP5 and the Apache PHP5 module is as given below:
yum install php
Make sure to restart Apache subsequently:
/etc/init.d/httpd restart -
4
Test PHP5 and get details about its Installation
Now, test the installed PHP5 and get details about its Installation. Do not forget that the document root of the default web site is /var/www/html. You can now simply generate a small PHP file in the directory and directly call it in a browser that is useful in putting lots of useful details about our PHP installation on show; including the installed PHP version etc. You can create the PHP file by:
vi /var/www/html/info.php
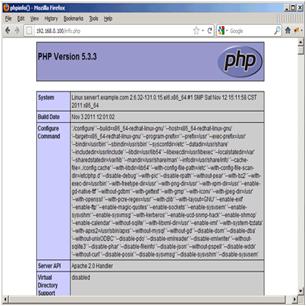
Simply call the generated file in a browser (e.g. http://192.168.0.100/info.php). Look into the image on right side for more information.
You will notice that the PHP5 is working through the Apache 2.0 Handler, clearly shown in the Server API line. Roll further down in order to check out the modules that are by now functionion in PHP5.
If you do not find the MySQL listed there, it means that you do not have the MySQL support in PHP5 yet.
-
5
Get the MySQL Support in PHP5
Now, you have to get the MySQL Support in PHP5. The installation of the php-mysql package is must for this purpose. Therefore, it is good to put in some other PHP5 modules. Follow the given below method to search for available PHP5 modules:
yum search php
Pick the PHP5 modules according to your requirement and install them like this:
yum install php-mysql php-gd php-imap php-ldap php-mbstring php-odbc php-pear php-xml php-xmlrpc
It is the time to restart Apache2 by:
/etc/init.d/httpd restart
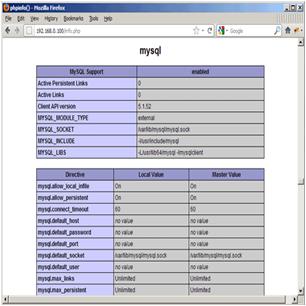
Move on and reload http://192.168.0.100/info.php in your browser and then scroll down to the modules section for another time.
You will now come across lots of new modules there, together with the MySQL module, as show in the picture.
-
6
Manage your MySQL databases through phpMyAdmin
phpMyAdmin is basically a free software tool written in PHP, which is planned to take care of the administration of MySQL over the World Wide Web. It is actually a web interface, which helps in handling your MySQL databases.
phpMyAdmin is not on hand in the official CentOS 6.1 repositories; therefore, you have to enable the RPMforge repository on your CentOS system.
Initially, import the RPMforge GPG key like this:
rpm --import http://dag.wieers.com/rpm/packages/RPM-GPG-KEY.dag.txt
Your phpMyAdmin can now be installed as given below:
yum install phpmyadmin
Go ahead and put together phpMyAdmin. Now, modify the Apache configuration so that the phpMyAdmin permits connections not just from local host:
vi /etc/httpd/conf.d/phpmyadmin.conf
After that you have to modify the authentication in phpMyAdmin from cookie to http:
vi /usr/share/phpmyadmin/config.inc.php
Start Apache again by:
/etc/init.d/httpd restart
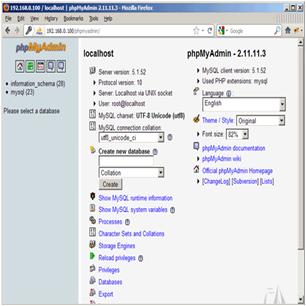
Then, you can access phpMyAdmin under http://192.168.0.100/phpmyadmin/.