How to Install the StatPress Statistics Plugin In a WordPress Blog

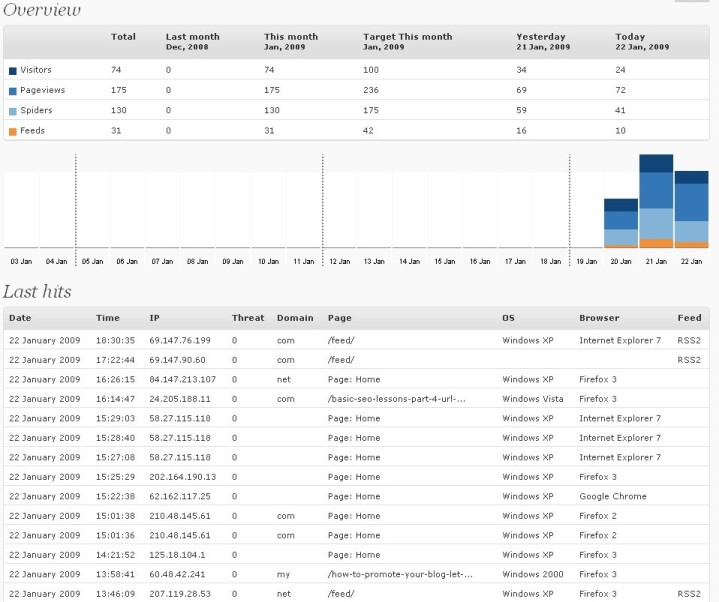
If you are running a WordPress blog for making good amount of money online, you will have to attract more and more number of people towards your blog. In addition, you have to know the time which your visitors spend on your blog to assess the potential of your content. You can use StatPress Statistics Plugin to get the necessary information about your visitors, spiders and feeds. In this way, you will be able to manage your content more efficiently and effectively. Besides, you also get a chance to know about the preferences of your audience which will eventually help you in improving your blogging skills.
Instructions
-
1
First of all, you have to sign in to your WordPress account. Just enter your username and password in the fields and press enter. Go to the dashboard of your blog and then to the plugin site.
-
2
When the plugin site appears on your screen, you have to search for StatPress. You can either find it manually or you can type its name in the search bar to find it quickly. After finding the plugin, click on it and save it on your computer. It will be better for you to keep your plugins in separate folders in your computer so as to access them easily in any inconvenient situation.
-
3
Now, you have to upload the plugin which you just downloaded into wp-content/plugins/. It will take a little time to upload. Make sure that you are connected to internet and your connection is working fine.
-
4
You may have to unzip the file (it varies from host to host). If you come across any sort of issue regarding uploading your plugin to your blog, you can contact with the customer service of your host.
-
5
After uploading the file, don’t delete the downloaded file from your computer as you may need it at any time in the future.
-
6
Go to your blog plugins page and find the WordStat. Activate the plugin so as to see the essential statistics of your blog’s traffic.


