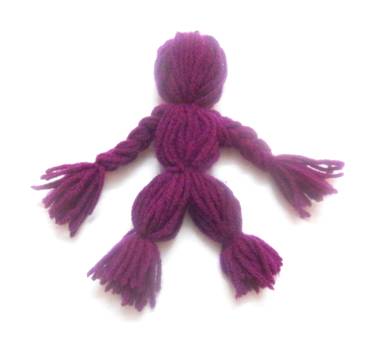
How to Make a Doll Using Yarn
Instructions
-
1
First you need to purchase around five to six yarn balls to make a doll. When it comes to choosing colours for the yarn, you can do it as per your preference. If you want to make your doll look interesting, then you can consider choosing different colour combinations.
-
2
Now you need to determine the size of the doll that you want to make. Take a piece of a thin cardboard according to your chosen dimensions.
-
3
Circle the yarn lengthwise around the piece of cardboard. During the first loop, fasten a knot in the beginning and continue circling the material. Keep counting the loops; you need at least 100 loops to make a good yarn doll. Use more yarn if you want the doll to be thicker.
-
4
Tie the last loop of yarn to the previous one and make a knot to secure it. Cut out a few small extra pieces of yarn which will help in tying more knots later in the project. You can also use a rubber band instead of the yarn strings.
-
5
Carefully take the strings off the cardboard and tie a piece of yarn where you want the head of the doll to be. Split the remaining yarn in 3 portions with the thick middle part as the torso and the remaining two as the arms.
-
6
Use pieces of yarn to tie the arms at the wrist point. Trim the excess loops at the end. Tie a string in the middle to make the waist and cut the looped ends of the yarn to make a skirt. Divide the skirt in two parts and tie it at the point where the ankle should be.
-
7
Now it is time to complete the face of your yarn doll. For that purpose, you can stick two small, coloured buttons on the head using liquid glue to make the eyes of the yarn doll. You can also add another button in the middle and slightly below the first two buttons, if you want to make a nice nose for your yarn doll.


