How to Make Your Own Pore Strips at Home

Blackheads and whiteheads on face malign your beauty considerably. They actually form in the skin due to dust and natural oils excreted by your skin, making your face look spotty. Acne spots are another common problem, especially in teenagers. Repeated facial treatments and chemical-filled beauty products to reduce these spots might result in further skin problems. For those who have sensitive skin, facial masks and skin care treatments can cause skin irritation and redness. Another better substitute to remove blackheads and whiteheads is to use pore strips. These thin cloth-like strips are readily available in beauty stores and effectively remove dust which your skin absorbs after a day’s outing. The usage of pore strips is very simple and it does not involve any harmful chemicals to come in contact with your skin. However, you don’t need to purchase pore strips again and again from the stores when you can prepare them at home at a far lower cost and ease. Making your own pore strips ensures what ingredients you are actually applying on your face. It won’t take much time to make pore strips of your own and you can make them whenever you want to use.
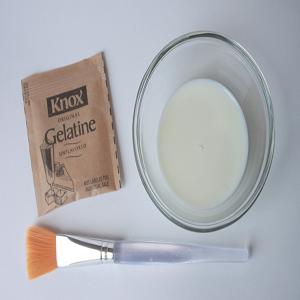
Things Required:
– Milk
– Gelatine
– Microwave-safe bowl
– A spoon
– Mixing brush
– Microwave oven
Instructions
-
1
Take a spoonful of milk in the microwave-safe bowl and add a spoonful of unflavoured gelatine to it. These will be the basic ingredients of your pore strips. You don’t need to purchase more expensive flavoured gelatine for your pore strips but if you like its aroma, you can spend some extra bucks.
-
2
Mix the contents together with a brush vigorously until you get a cloudy blend. Milk will combine with gelatine to form a thick slime.
-
3
Put the contents into the microwave oven and heat them for just 10 seconds. Take it out and let it cool for 20 seconds.
-
4
Once the mixture has cooled down, apply some of it on your hand to test the temperature. If it is cool enough for you, apply the mixture to your nose and upper area of cheeks. Use the brush or even your fingers.
-
5
Let the strip dry for 10 minutes and it will stick to your skin. Peel it off slowly and you can see how much dirt it has extracted from your face!


