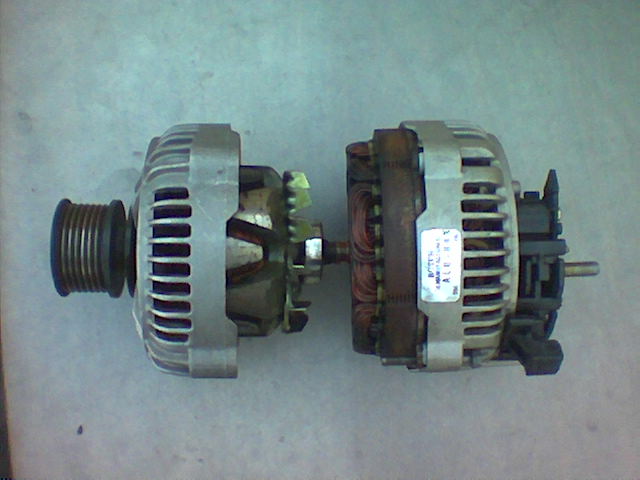
How To Rebuild an Alternator

Alternator is device which is used to convert mechanical energy into electrical energy and produces alternating current as a result. There are two types of alternators; the most common type uses a rotating magnetic field and a fixed armature. The other variation uses a stationary magnetic field with a moving armature to produce electric current.
All AC electric generators can be used to produce electrical energy provided you attach a moving source of mechanical energy within them. However, the term alternator is commonly used for small rotating generators present in automobiles that are used to charge the battery. These alternators take a tiny amount of the rotational energy produced in the combustion engine and use it to produce alternating current.
Alternating current cannot directly charge a car battery; so an AC to DC rectifier is also attached with an alternator. Some alternators use a permanent magnet to generate the magnetic field and are known as magneto.
The alternator is in motion the moment you fire the ignition of the car. Over extended periods of time, the contact points between the alternator brushes wear out and can cause the connection to go loose. Replacing complete alternator is an expensive affair, so it is advisable to overhaul or rebuild the alternator in your backyard.
Instructions
-
1
Disconnect the terminals of the battery. Use a spanner to loosen the bolts present on top of the alternator. Some alternators may also have the same bolt present underneath them.
-
2
Move the alternator in the direction of the motor so you can take of the belt from the pulley. Disconnect both wires connected to the back of the alternator and remember to label them to avoid confusion later on. Take out the alternator out of the socket.
-
3
Locate the voltage regulator on the back of the alternator and remove it; it will be a small button like thing on the back side of the alternator.
-
4
Open the voltage regulator carefully and remove both worn out brushes. You should remove the brushes one at a time through the space present in the regulator. Attach the new brushes after cleaning the inside of the regulator.
-
5
Attach the regulator back in its place and fix the alternator back in its slot. Connect the wires in the same sequence and oil the bolts. Insert the bottom bolt first and align the alternator with the top bracket. After correcting the alignment, tighten the top bolt and reattach the belt with the pulley. Congratulations on overhauling your alternator.


