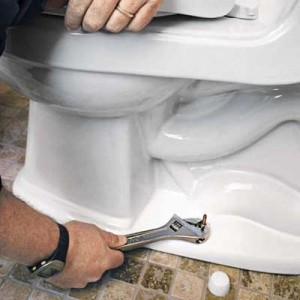
How to Replace a Toilet Flange

There is nothing worse than flushing the toilet only to discover water leaking from the base. This is usually a very good indication that the toilet flange needs to be replaced. A toilet flange is basically a pipe that keeps the toilet firmly on the floor and connects it to the drain. It is not very difficult to replace a toilet flange but you can do it with the right tools and a little patience.
Things Required:
– Flange
– Tape measure
– Piece of 3 or 4 inch PVC pipe
– PVC glue
– Wax ring
– Coupling
– Dremel tool
– Putty knife
– Hacksaw
– Screwdriver
– Safety goggles
– Marker
Instructions
-
1
Flange Removal
You will first have to remove the old flange by removing all the water pipes from your toilet. Make sure you flush the toilet to let the excess water drain out. Now look for the two large bolts that hold down the toilet and loosen them. Gently lift the toilet from the floor and put to the side.
It is now time to remove the flange seal using the screwdriver. Make sure you also clean off any wax from the seal off the flange. Take the Dremel tool and cut the old flange out. Use the tape measure and check the size of the drain pipe sticking out from the floor. Visit your nearest home improvement store and pick up some new pipe, PVC glue, coupling, flange and wax ring. -
2
Flange Preparation
You will now have to prepare the flange before installing it. Attach the coupling and the new pipe to the drain in the floor. Use the marker and make a note of the height that you require. Make sure to take out the coupling and pipe as you use the hacksaw to get the right size.
Take the PVC glue and attach all three pieces together. Make sure to glue all the pieces in their respective places. -
3
Flange Replacement
Now you can replace the flange by attaching the new one and replacing the bolts. Also, attach the wax seal that you purchased to the bottom of the pipe so that it sits between the toilet and the flange.
Gently put the toilet back in place over the flange by carefully lining up the main bolts. Be sure to tighten the bolts to ensure that the toilet is securely fixed. You can now connect all the water pipes back to the toilet and test it out.


