How to Set Image Size on a Digital Camera

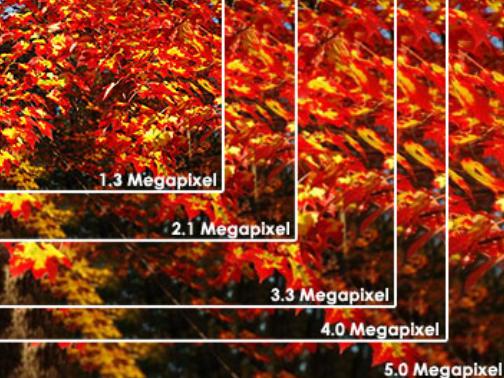
If you have a digital camera and you want to change its resolution, or in other words, the size of the image, then you have reached the right place, as this article will talk about the method by which you can look for the right way to change image size settings. Most of the cameras these days offer such option, as it allows the users to change the size and quality of the image, according to their needs. If you want to take more photos, then you will have to reduce the image size, as it will then take less space on the disk installed in the camera.
Instructions
-
1
Check the user instruction manual and check the lowest and highest resolution settings that your camera provides. Usually, the camera is set to its maximum capability, by default. You can then follow the instructions and change the settings according to your needs.
If you want high quality pictures, then you should set the file size to maximum. On the contrary, you should set the size small, if you want to take more pictures. Make sure you do not set the size too small, as it will greatly affect the quality of the image you take. -
2
If you have lost your instructions manual, then you can manually toggle through the options and look for the resolution settings. When found, change the settings according to your requirements.
-
3
If you have taken pictures and now you are getting out of disk space, then you may want to change the size of the already taken pictures, in order to free more space in the disk installed in the camera. Many cameras offer this option, which allows you to change the resolution, without doing it on your computer. So, locate the option which converts the image size, in your camera, and change the resolution according to your needs.
-
4
You can also change the size of the image by transferring the pictures to computer and then using an image editing software. Adobe Photoshop is a great program which you can use to edit the size and quality of the images you take from your camera.


