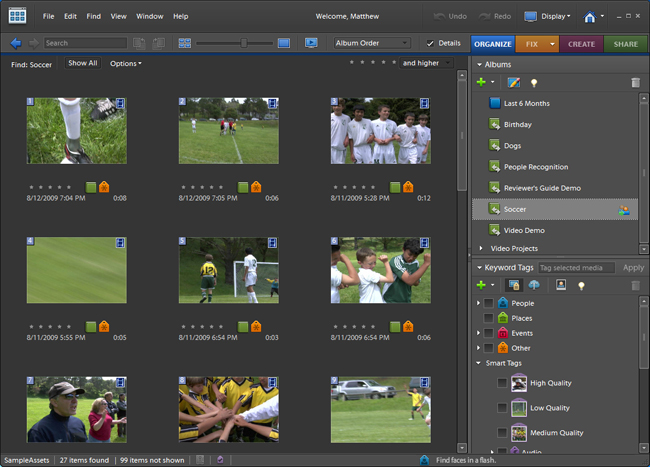
How to Use Adobe Elements Photo Organizer

If you have Adobe Photoshop Elements installed in your computer, then you have the facility to find and manage your photos using a feature called Adobe Elements Photo Organizer. The Photo Organizer is a separate program and opens in a completely new window. Yet, it still remains a part of the Adobe Elements.
The program may not be as intuitive as some other photo managers such as Picasa, however, it works flawlessly with other parts of the Adobe Elements program. Using Adobe Elements Photo Organizer is same as using any other photo organizer. This article will talk about some of the basic functions of the program.
Instructions
-
1
In order to use Photo Organizer, you will have to first run the Adobe Elements application in Editor mode. After the program starts running, click the “Organizer” button to open the Photo Organizer in a separate window.
At program start up, you will be asked to whether search for images in your computer or you plan to do it later. Click the “Yes” button to add your images to the workspace. You can also create a new folder for your pictures by clicking the “+” sign under “Albums”. -
2
When you run the program for the first time, it will set “My Pictures” folder in “My Documents” as the default folder. Here, you should be careful if you have hundreds and thousands of pictures saved in My Pictures folder, as the program will create thumbnails for each and every picture present in the folder. So, if you have too many images, then it will take too much time to create the thumbnails every time you launch the program. Therefore, it is advised that you should create different folders category wise, in order to save your time.
-
3
You can then create different albums for different pictures in your workspace. You can also add notes to your albums such as assigning dates and locations. Once you have created and opened your album, you can drag and drop images from the workspace to the albums. The photos will remain in the workspace, however, each photo will now have a small icon under the thumbnail, pointing towards the album where the picture is saved.
-
4
You can also assign star rating to each of the image saved in the workspace. The process is really easy, as you just need to click the stars under each image, to give it your desired rating.


