How to Use Graphics Formatting in HTML

If you own a website or a blog, working with HTML graphic tags is a must for you. It doesn’t mean you should have extensive knowledge of website development, but the basic know how of how to make your web page more attractive with the combination of document and text formatting tags.
This guide is about basic introduction for graphic tags and how you can modify web page in HTML. Once you are done with inserting text in your web page you may want to update it with different background images, border or lines etc. Follow these lines in order to get basic information about graphic formatting tags.
Instructions
-
1
How to insert Image
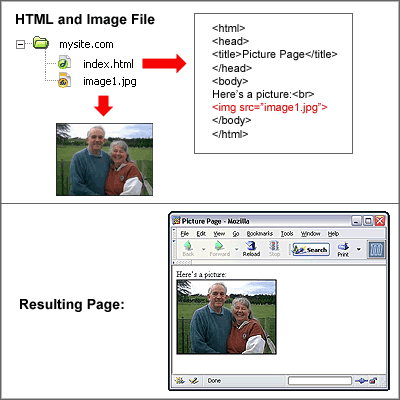
You might be having this question in your mind, how to insert an image in a web page? So it is very simple and easy and single tag dependent task. There is a image tag
< img src="filename"> it places an image in the document\ web page. -
2
Image Insertion
Most important of all is the image insertion, as you can modify image settings only when it's inserted in the text.
< img src="filename"> it places an image in the document\ web page.
Example: <img src="http://yoursite.com/images/flower.jpg"> will insert the specific image in the text. -
3
Image Attributes
Knowing about this tag is not enough for different updates and modification of your documents. For insertion of different images with different creative ideas you need to learn about image attributes. These attributes allow you to make changes into your document like, height, width, and border color etc.
Now let’s talk about basics of these attributes.
- align=top,middle,bottom: by using this attribute you can align your text in middle, bottom or at picture’s top.
- align=left,right: this means by using this attribute you can place image on left or right side of the web page and also can wrap text around it.
- width,height= you can give any number in this attribute to fix the image on your web page or document.
For example:
< image src="abc.jpg" height=”100” width=”200”>
Now this will fix the height into 100 and width into 200 in your document. These numbers can be in pixels or percentage.
Note: you can change dimensions of the picture but be careful while using the pixels ratio. -
4
Image Description
- alt= alt means that you can add a short description of the image in this tag, to let the crawlers know the details of the image.
- title= it's image's title that appears on moving your mouse on picture. (text-only)
- border= this sets a border around image and you can change the width, length and color of the border. it is also in pixels or in percentage.
For example: border=”3”
- vspace,hspace= this indicates empty space around the image, and we use it with pixels.
For example: vspace=”2”.


